Hello! Happy Monday. I hope the start to your week has been good! I've been watching a lot of the World Cup and can't get enough. I've played football (soccer) for my entire life so this is a really special time of year for me!
I mean, just look at me on my first team back at age 4. So, so tough. Right???

Ok enough of baby Emily, I know if I go on you will all be blinded by my cuteness so I guess it's time for the actual blog post!
Today's post is going to be about hair (as the title might indicate).
Over the years, I've gone through a fair number of hair styles. Today I'm going to share with you some of my favorite quick, cute, and easy hairstyles that I personally love!
♡
The health and strength of your hair is incredibly important which is why I let mine air dry today. It's nice to give your hair a rest now and then: all the heat from curlers/dryers/straighteners is really damaging - and if you do use these make sure to keep your hair strong by using a heat protectant spray. My favorite is the TRESemmé Thermal Creations Heat Tamer Spray which I've used for a long time now. It's a great protectant against heat and to top it off, it smells amazing.
After my shower, I used the Pantene Smooth Lisse Argan Serum. I pumped a dime-sized amount onto my fingers and massaged it into the ends of my hair. I love moroccan/argan oil and this particular version smells great and has really made my hair healthier and shinier as of late!
That's my really basic, post-shower routine for my hair: just a bit of argan oil and either air drying or blowdrying!
On the days where I decide not to leave it wavy or put it up in a messy bun or ponytail, I usually do a variation of a few different cute, quick hairstyles.
Today I'm going to tell and show you how I do these styles.
I find they're all super simple, quick for a busy morning, and really cute!
Keep reading for 5 hairstyles I guarantee you'll love!
♡
♡
1. Halo Braid Down-Do

You've probably seen halo braids on almost everyone now (and probably across all sorts of beauty sites), but I still love this style for me and anyone!
To create this I follow 6 easy steps:
1. With your hair middle-parted, take a strip of hair from one side of the part. The strip of hair should be taken from the front of your head. Depending on how you want your finished braid to look, take as much or as little hair as you want. Obviously, a thicker strip of hair will give you chunkier braids and a thinner strip will give you smaller braids. I took about a medium-small strip of hair. I also left about the same amount of hair out of the strip, wanting to have a 'bangs' effect.
2. Braid your strip of hair and secure it with an elastic band. I used Goody Elastic Clear Hair Ties. After you secure this braid, do the exact same thing to the other side of your hair.
3. Flip your braid upside down and bring it across your head in the area where a headband would normally lay. As you bring it across your head, make it as tight or as loose against your head as you want. I kept mine taut against my head because with my medium-length hair, it looks better that way.
4. Secure the braid you've brought across your head behind your ear area with a few clips or bobby pins. Don't worry if you can see the bobby pins still. We'll be covering that later.
5. Do the same thing with the braid from the other side of your hair. Bring it across your head and bobby pin it behind your ear on the other side.
6. Now, bring the hair that isn't stuck on the bobby pins, back forward and tease it until it covers the pins. I also kept those bits of hair out for a 'bangs' look, so that helped cover the bobby pins. Do your hair however you want from here. I find giving it a bit of tease or curls makes for a fun twist.

Here's the finished look. I love love love this!
I know that's a super complicated explanation of halo braids and I'm sorry. There are awesome tutorials on youtube and on other blogs so check those out since mine really isn't cutting it :)
2. Teased Half-Updo (with optional braids)

This look is an absolute stunner. I wear this as much as I can and find it looks awesome at nice/dressier occasions.
It's literally the easiest thing to accomplish as well.
All you have to do is act as if you're putting your hair into a half-ponytail. Then, take a comb and tease the hair that you would've been putting in your half-ponytail (just backcomb the underside of the hair to get the teased, big-hair effect). After your hair is teased and big and bold, just finagle it into that same half-ponytail shape but instead of a hair-tie, we're going to use bobby pins to pin it back and push it up for even more volume and height.
You can leave your up-do at that if you choose, like my photo on the left or you can add a fun twist to it.
My fun twist is halo braids. I just grab some of the remaining hair and create two braids, bring them across my head, and secure them with bobby pins. It looks so cute and gives your half up-do something extra! (Don't forget the hairspray!)
3. High Bun with Accessories
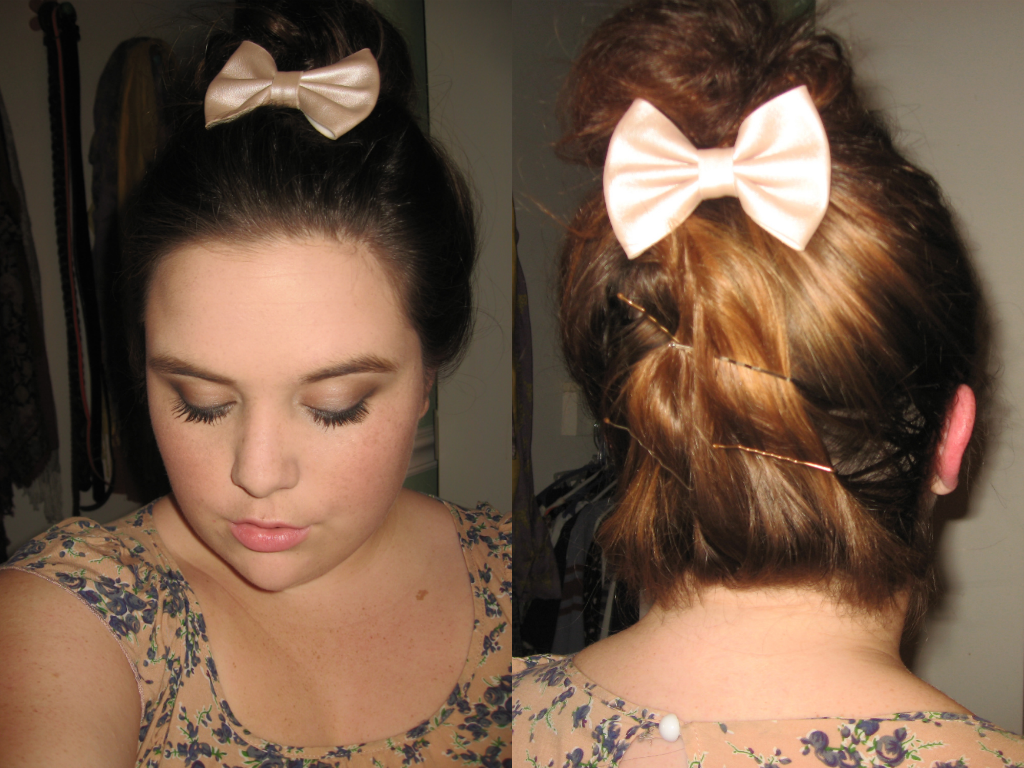
Another easy look. This one is a high-bun that is easy to add hair accessories to. To achieve this, all I do is give my hair a bit of teasing (backcomb it) and then pull it up into a messy high bun. The real fun is when you add the stuff to it!
One fun look is to add a bow (mine's a pink faux-leather bow from Forever 21) to the back or the front of your bun. It gives a more formal and girly touch!
More fun things to add to your bun are headbands! Mine are from various places including H&M, Forever 21, and Brandy Melville

4. The Classic Curl

This is pretty self-explanatory but I'll tell you about it anyway. Basically, I just use a curling wand (whatever is your favorite will do!) and curl my entire head! I alternate the direction of the curl every chunk of hair so it looks more natural and then finish with a bit of hairspray. I love curly hair - there's lots of things you can do or add to it.
5. Deep Part + Waves

My last favorite and quick hairstyle is so so so simple. I start with curly hair that I brush out to create waves and then all I do is make a deep part on one side of my hair and then tease up the other side so I've got really voluminous waves. It looks really good on anyone and it's simple, yet glamourous.
I hope you enjoyed learning about my favorite quick and cute hairstyles!
xo Emily
P.S. GO watch some of the World Cup. NOW!!!!
Great you hair beautiful. <3
ReplyDelete