Showing posts with label nails. Show all posts

Spring Nails

Thursday, March 31, 2016

Hey everyone! I'm so excited to say that it's finally looking a lot like Spring in New York. The weather has been so strange for the past few months, alternating between snow and cold to temperatures in the 70s. But this week has been lovely, with flowers blooming and floral dresses coming to the streets of Manhattan.

Today's post is all about Spring Nails. I'm going to show you one of my favorite ways to spruce up your Spring nails and share a few of my favorite nail polishes for Spring!

~

One of my favorite ways to add something extra to my nails is with a texturized topcoat, glitter, or a matte finish. Today's nail look starts with one of my favorite nail polishes ever, Zoya's 'Dot', a pale and glossy pink that I pop on when Spring comes around. 

To add some pizazz, I've added Essie's glitter topcoat in 'Jazzy Jubilant' on top of 'Dot'. This is such a nice addition to any Spring nail polish you might have on and I like how the glitter catches in the sun, really reminding you of how vibrant and glamorous it is. 

Funnily enough, 'Jazzy Jubilant' which I've had for over two years, is featured in Cosmopolitan's picks for perfect nail polishes for this Spring! Great minds, eh? 


You can add this topcoat to any of your favorite Spring nail polish colors, but I've given you a few of my own favorites for inspiration below!

Spring Nails

1. Zoya 'Dot' ($10)
6. Essie 'Shades On' ($8.50)

What are your favorite shades for Spring?

xo Emily

Spring Nail Polish Picks

Sunday, March 15, 2015

For Spring I'm loving (as most would assume) pastel shades that are soft and sweet. That means light pinks, blues, and purples with a few bright colors in the form of hot pink, mint, and periwinkle!

Spring Nail Polish Picks

Here are my picks (from left)

Essie 'Picked Perfect' - Caramel brown with red and violet undertones
Zoya 'Dot' - Pink, petal cream 
L'Oreal 'Pink Me Up' - Hot, bright pink
OPI 'That's Hula-Rious' - Pastel mint green
Jenna Hipp 'Throwing Shade' - Soft and creamy light lavender 
Zoya 'Blu' - Pale baby blue, dreamy and delicate
Essie 'Blossom Dandy' - Mint cream hydrangea green/blue

xo Emily

I've got my nails done up....

Tuesday, January 13, 2015

Hello everyone! Today's post is nail polish themed, which is so fun because I absolutely love painting my nails. There's not a day when I've got bare nails and it's always fun to spend time experimenting with color and design!  

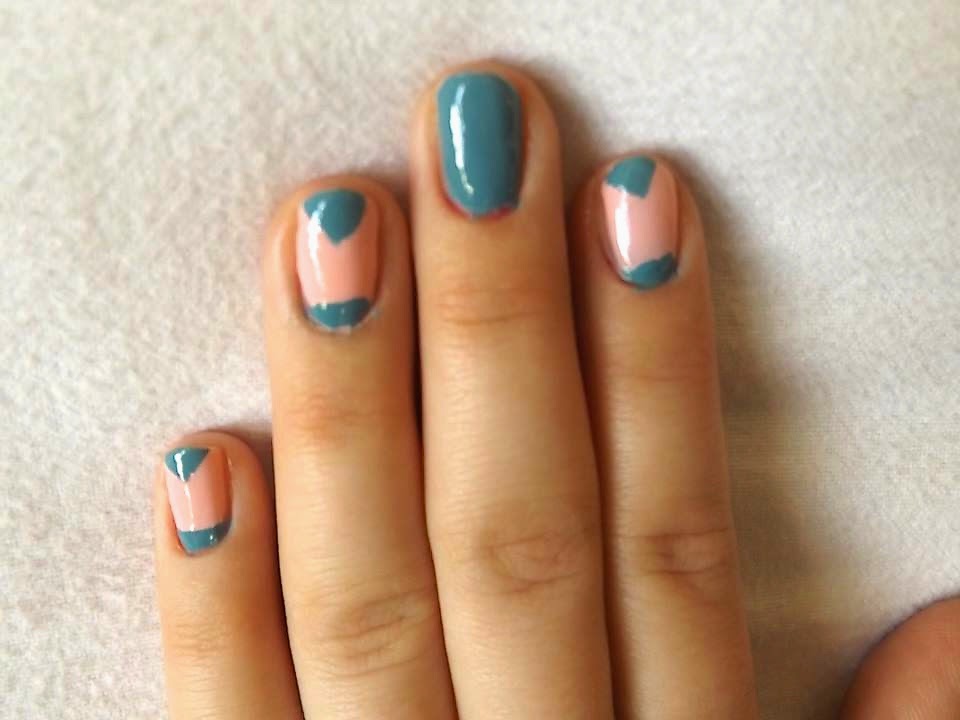
My nails today are inspired by this "Winterize Your Nails" color swatch from Julep. My favorite two shades were 'Shari' and 'Kiki' so I decided to do a bit of an inspired look using my own nail polishes. 


To get this nail look, I started by painting all my nails with a light pink shade and then once they dried, I cut out bits of tape and then put them on my nails to make the shapes I wanted (triangles for the top of the nails, and a small strip of tape at the bottom to get that little band of turquoise) and then painted the non-taped parts using a pretty blue/turquoise polish. 


To add some extra protection, I used a topcoat once everything dried. I find using a topcoat in winter helps to keep your nails lasting longer, especially as our nails will crack and be more damaged in frigid temperatures. 


And if you live any place where it's cold right now, you'll know that we're having record setting low temperatures. It's incredibly important protect your skin and body against the cold. If you liked my winter friendly makeup tips, then these tips for 'Winterizing' your nails will also come in handy.


Did you like my nail polish look today? I think I might do more of these, they're super fun and gives me an excuse to buy more polish (sorry bank account!). I keep creeping on all of Julep's pretty new colors, someone stop me! 


xo Emily

Manicure Monday

Monday, July 7, 2014

Hello all! Happy Monday! I've had a really lazy day and decided that it would be the perfect time to share one of my favorite nail looks with you all!


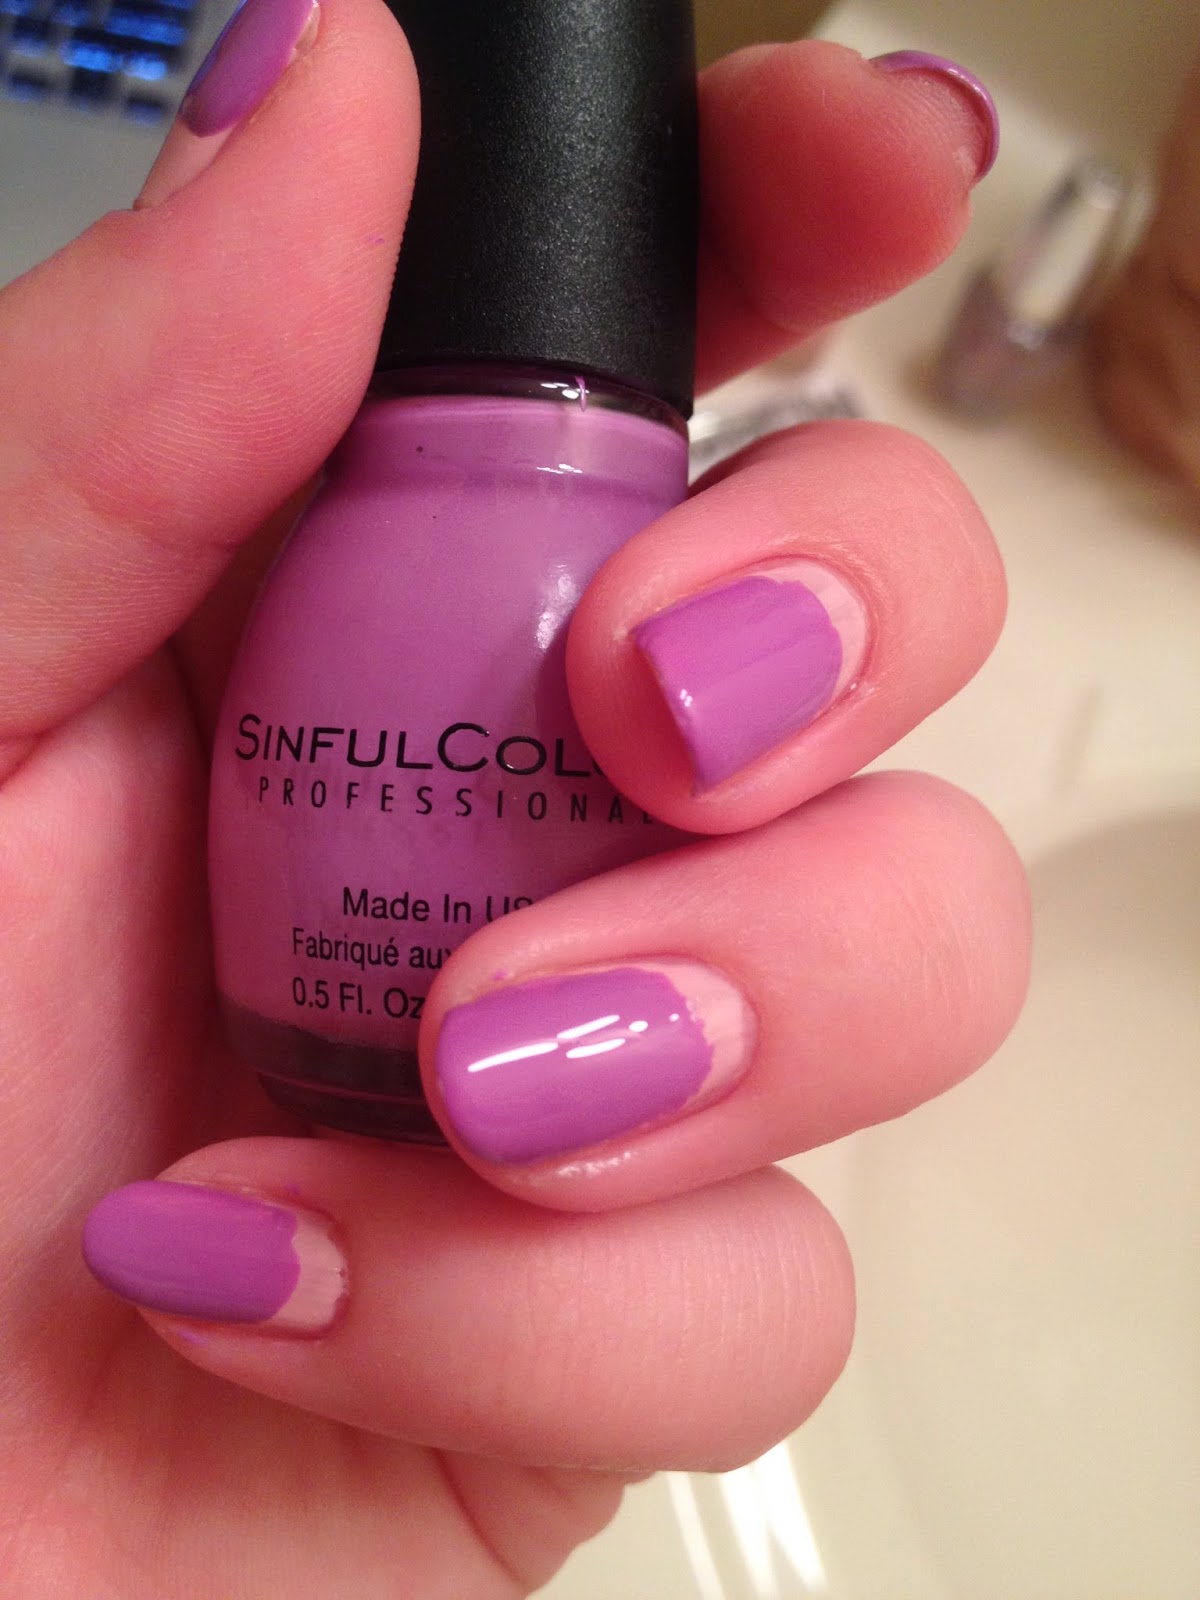
I call it the "Ice Cream Scoop" because I use pastel polishes and layer them so it kind of looks like dripping ice cream!


Here's how to get this nail look!

First off, start with fresh nails. It's important to keep your nails strong and healthy so that they don't flake, break too easily, or get damaged by repeated use of nail polish remover and nail polish itself. To keep your nails healthy here are a few tips:


- Keep your nails regularly filed and cut, so that they won't accidentally break
- Don't bite and pick at your nails
- Keep your nails moisturized by using lotions everyday (this is also good for  your hands)
- Don't use acetone-based nail polish remover. It'll dry out your nails.
- Base coats and top coats will help keep your nails protected, and keep your  manicure on longer, which will keep you from having to overdo the remover  and polish
- Eat healthy and try to take a vitamin containing Biotin - it helps keep nails    strong


Okay, let's get into it!

As I said, we're starting out with clean nails. 


Next up I'm taking my Zoya nail polish in the color 'Dot' which is a very light, pastel pink. This is one of my favorite go-to colors and I think it's adds just the perfect amount of pop. 


After letting that dry, I went in with my Sinful Colors polish in the shade 'Tempest', a darker purple. It's still very pastel, but adds a bit more color to my nails. I applied this on about 3/4 of my nail, leaving the area near my cuticle free of purple.  I really like this polish and have been a huge fan of Sinful Colors for years now. Their polishes are so affordable (under $2 each) and there are so many color choices.


I then went in with the small, detailer brush from my Sally Hansen I Heart Nail Art Kit and gave the edge of the polish a rounded, melty look; mimicking ice cream.


I've been really loving this little kit ever since I picked it up a few weeks ago. It lets you do fun designs with your polish. I love the three tools it comes with; one detailer brush, one striping brush, and one marbling and dotting tool, and it's so easy to use and not too expensive. ($6 at Target)


 My last step in creating the pastel Ice Cream nail art look was to add the third color, an Urban Outfitters polish called 'Crowded' to the tips of my nails. This shade is one of my favorites; just a pastel periwinkle color.


After my nails were dry, I just used the applicator to dot a line across the top of my nails; where the white in a french manicure would usually go. I again used my small detailer brush and made sure it looked melty.


This is definitely a go-to manicure look for me and it's so easy to accomplish. You don't even need the tool kit to achieve it, either!

Hope you get some #nailspiration from this!

Have a great day!

xo Emily